Automobile braking system and accessories in-depth analysis
Among the many systems of a car, the braking system is undoubtedly a crucial component. It not only affects the driving safety
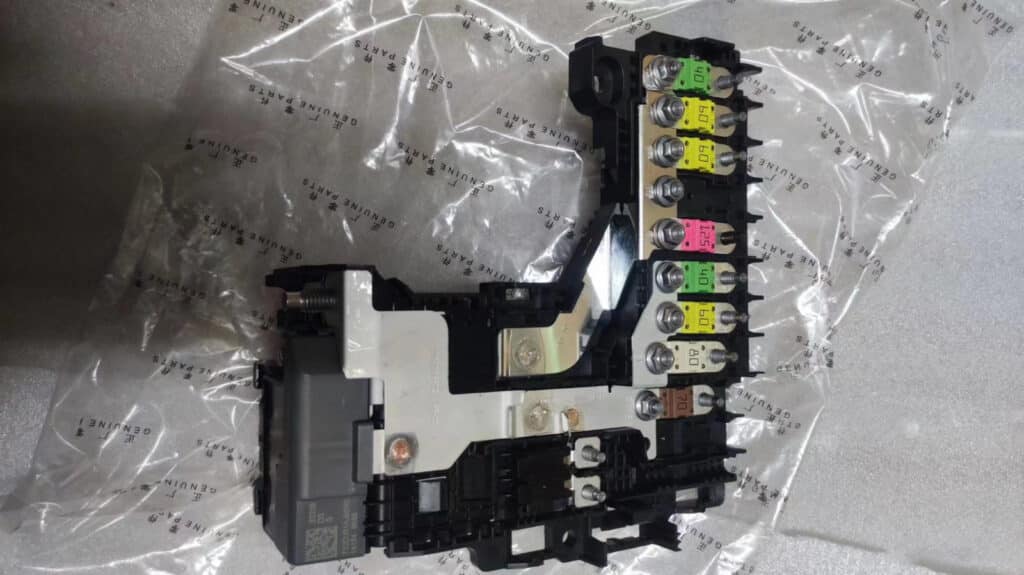
Replacing the BPGA (power protection and management control unit) module of a Peugeot car is a relatively complex but important repair step that requires careful operation and professional knowledge. The following is a detailed step-by-step guide to help you successfully complete the replacement of the BPGA module.
Make sure you have the necessary tools, including a slotted bolt driver, a suitable socket (such as 13mm, 8mm), a ratchet wrench, a torque wrench, and electrical tape.
Make sure the vehicle has turned off the ignition switch and wait for at least 5 minutes for the vehicle to enter sleep mode. At the same time, disconnect the positive and negative cables of the battery to avoid accidents during the replacement process.
After the vehicle enters sleep mode, open the hood and find the location of the BPGA module.
First unplug the wiring harness connector connected to the BPGA, and press the card interface of the BPGA to remove the BPGA and its cover. Note that when removing the cover, be careful not to damage the surrounding wiring or components.
In order to accurately connect all lines when installing the new module, it is recommended to mark each wire and its corresponding fuse position on the BPGA before removal. After that, unscrew all nuts (usually M5 nuts) installed on the BPGA and loosen each wire connected to the BPGA and its fixing bolts.
Place the new BPGA module on the bracket box body and connect each wire to the fuse position of the BPGA one by one according to the wire position marked before. Use a torque wrench to tighten the M5 nut according to the specified torque (usually 4.25~5.75N·m).
Fix the positive battery cable to the stud on the outside of the BPGA and use a torque wrench to tighten the new M8 nut with an appropriate torque (such as 12N·m). Then, fix the new BPGA on the bracket box body and ensure that the harness connector is firmly connected to the BPGA. Finally, connect the negative battery cable and tighten the hexagonal flange nut with a torque wrench to the specified torque (e.g. 6N·m).

After completing all connections, reconnect the positive and negative battery cables and try to start the vehicle. If the vehicle can start normally, then you need to confirm whether the various functions of the vehicle are normal, such as window lifting, door lock control, etc.
If everything is normal, readjust the vehicle’s time, date and other settings according to the vehicle manual.
Throughout the replacement process, be careful to avoid damaging surrounding wiring, components or vehicle paint.
When disconnecting and connecting any electrical components, always make sure that the vehicle’s ignition switch is turned off and the battery power is disconnected to prevent the risk of electric shock.
When using a torque wrench, follow the manufacturer’s recommended torque value to ensure that the connection is secure and does not damage the components.
By following the above steps and precautions, you should be able to successfully replace the BPGA module of your Peugeot vehicle. If you encounter any difficulties or uncertainties, please seek help from a professional technician in a timely manner.

Among the many systems of a car, the braking system is undoubtedly a crucial component. It not only affects the driving safety

In the long history of the automobile industry, the transmission system plays a vital role as a bridge connecting the engine and

In the long history of the automobile industry, the engine is the heart of the car, and its performance directly determines the